Monday, February 20, 2017

Celebrating Our Little Girl's Birthday!

Our little miss Lydia turned 4 today and we celebrated with some good food, family time, and a few trips here and there.

To begin her special day, my husband made some delicious chocolate chip pancakes for breakfast- and the birthday girl got an "extra" birthday candle for her pancake. :)


After breakfast, we took the kids to The Nauticus in Norfolk. We were both pleasantly surprised that the kids loved it. I mean, we knew they would probably like going there because they love museums and it was something new...but they really LOVED it. Lydia was so excited about it and wants to go back again!


Hugs for the birthday girl!


We spent a good amount of time on "the Wisconsin"- an Iowa-class battleship. It was huge and the kids want to go back to explore more of it. This museum was recommended to us by a good friend, so if you live nearby, definitely check it out!


Ah, it was a beautiful day!!!

After the museum, we grabbed lunch and let Lydia pick out a book at a Barnes and Nobles nearby. She loves books and Peppa the Pig is one of her favorites, so it was no surprise when she grabbed a Peppa the Pig Easter book. ;)

After a little shopping, it was time to go home and do a little more celebrating!!

We decided to bust out the birthday cake before dinner- because why not?! It was a very special day and the birthday girl did not complain about that call.


One of the reasons she chose this particular cake was because it had 2 of her favorite colors- pink and purple. The flowers with confetti all sprinkled over the top helped seal the deal for her.


We skyped with family afterwards and let the kids play with the bubble maker that Lydia got as a gift. That was a hit and will be fun to have around in the summer too! 


This girl danced, and danced, and danced so freely with the bubbles. It was SO fun to watch. She really loves to dance, that one! I could learn a move or two from her.


Baby girl, I want you to know that you are so well loved. The joy you have brought to our lives already is obvious! You are fearless and so carefree- I sometimes look at you and think "where did all that personality come from?" I certainly wish I could bottle some of it up for myself! Thank you for making each day brighter and livelier! Happy 4th birthday and here's to many, many more!!!


These last few shots were from our trip to Jamestown a few days ago. I love them because they show just how much of a helper you are along with your beautiful smile.


We are so grateful for you! I love you!!

Thursday, February 9, 2017

Hanging Inexpensive Pendant Lights in the Kitchen

Ever since we my husband took down the cabinets over our kitchen peninsula, the area in and around it just felt a little too dark for our liking. We tried to "fix" that problem by adding a brighter light over our kitchen island, but that really didn't help. Over the past year, we had talked some about the possibility of putting pendants over the peninsula some day- but hadn't planned on doing that for another couple of months.

While browsing the lighting aisle at Home Depot a few weeks ago to look for a new entryway light, we stumbled upon 3 small pendant lights for $30. While it wasn't what we were looking to buy that particular day, we didn't see anything we liked for the entryway, and since we had been thinking about getting some pendant lights for the kitchen eventually, we figured, "why not get them now?" I mean, $30 for 3 pendants ain't a shabby deal! So we picked 'em up, loaded the box into the cart, and bought them! 

My husband wanted to take some time to think about how he was going to hang 2 of the 3 pendants over the kitchen peninsula...for various reasons (note: we used the other pendant over our kitchen nook which can be seen in some of the photos at the end of this post).  One of those reasons was pretty obvious, as you can see in some of the photos below. ;)


Yep, we had a BIG hole in the ceiling
That was a fun surprise to find once the cabinets were removed. 


Anyways, to somewhat "hide" the hole better, my husband put a "patch" over it- and that's how we left that area for over 2 years. Seeing that neither of us was happy with the cover-up, we knew we couldn't just hang the pendants directly from the ceiling. And since we were using 2 lights and not one, we needed a creative way to hide the hole and hang two lights around it. 
After much thinking, my husband came up with a great idea to cover the mess with an MDF board- a 1" by 12" and 6'. 


He also added some wooden trim around the board so the cords/wiring from the pendants could hide underneath. Clever!


Once the trim was nailed into place, the next step was to figure out the placement of our pendants. My husband did all the measuring for that part, thankfully!


Once all the measuring was out of the way, he drilled 2 holes into the MDF board. This was needed to get the mounting brackets attached and allow space for the cord to go through.


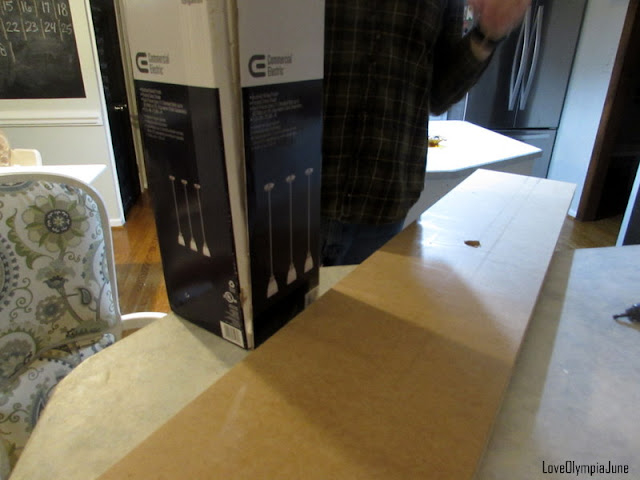
And these were the pendants we bought- ready to be taken out of the box!!


Next came all the wiring- I really have no clue what to do when it comes to stuff like that. I tried to pay attention to it while he worked, but it just looked so complicated and dangerous. I think that even if I learned how to wire lights, I probably wouldn't do it. ;) 


Oh, and the bar stools you see in the next photo were used to help keep the MDF board up along with the lights. This helped keep the board steady while all the wiring happened (the MDF was actually pretty heavy to lift).


To hang the board up, my husband held up one side of the board to drill a few screws into the wood above while I held up the other side. Once one side was attached to the ceiling, we were amazed that the board actually held up on it's own. But don't worry, we added more screws to the other side. 
This thing is going nowhere!!


Sorry about some of the blurry photos! A lot of this project was completed after our kiddos went to bed so it was pretty dark!


To finish off this project, I painted the board with some leftover white paint (SW Alabaster). I still need to caulk a few areas and do a little touch up paint to some spots, but I've been dragging my feet on that part, as usual. ;)

I did take a few photos of how it all looks right now!


These babies give off so much light that I couldn't keep them turned on for the photos. However, we use them regularly now and are really happy with the outcome. The girls love eating their breakfast and snacks there. It's also a great space for our girls to draw and color. :)

My husband did a great job putting this all together for me. I really didn't do a whole lot, except take a few pictures along the way and try to encourage him that the end was in sight. ;)


Wednesday, February 1, 2017

Stenciling in the Laundry Room- An Inexpensive DIY Project

Tackling our laundry room was one of the first projects that we completed shortly after moving into our home a few years ago...removing the upper cabinets in our kitchen was one of the firsts.
The laundry room was one of those spaces that still had wallpaper leftover from the previous owners, so my husband and I removed it before we painted. (For the record, removing wallpaper is not a fun process! But I am glad we did it!!)

Once the wallpaper was removed, I painted the room with SW Pavestone- a gray that doesn't really have a strong undertone. I have always felt that since our laundry room doesn't get much light, the space just looked a little too dark with the gray walls and I wanted to lighten things up a bit in there. Needless to say, 2 years passed and I hadn't done anything. 
It wasn't until recently that I decided to go ahead and lighten up the space by painting the lower portion of the walls with a pretty white, SW Alabaster, and adding a stencil to the rest of the walls. It made such a difference!

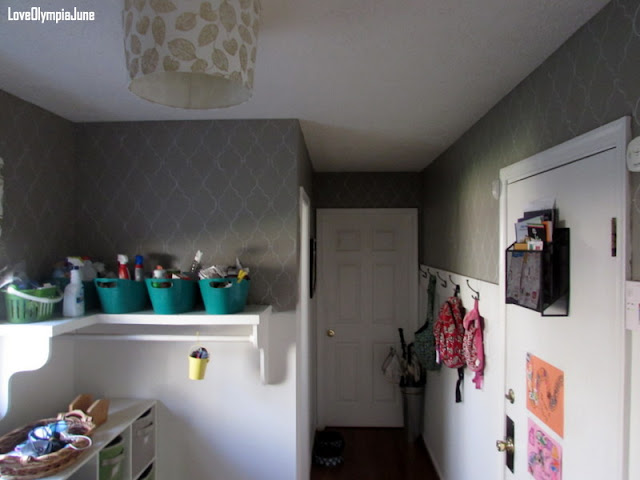
So to backtrack a bit, here is how the room looked with SW Pavestone everywhere:


It wasn't bad at all, but with one little window, it felt too dark.

Since I knew I wanted to stencil part of the walls, I searched online for a few ideas and landed on this trellis pattern pictured below. It ties in with our rug and some fabric we have on our pillows.


I had my husband print out a template and then traced it onto some cardboard we had leftover from a food box. ;) 
Stenciling did take quite a while- I ended up spreading that part out over weekend and am glad my husband told me not to stencil the entire space!! That would've taken forever and would've been an unpleasant process. Oh, and I used a Sharpie marker pen that apparently I have had for several years- just totally forgot about it until I searched the house for one! Ha!

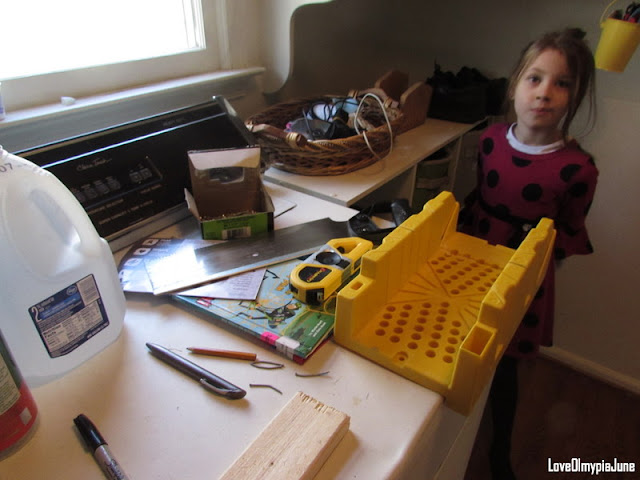
Here is a quick run down of the supplies used for this project:
Stencil and template
Sharpie marker pen
Gallon of SW Alabaster and paint brush
Ruler
Leveler
Trim and nails   

I didn't take any pictures of the stenciling and painting process, unfortunately, but here are some afters once it was all finished.


Much lighter and brighter AND much more visually appealing!
We LOVED it...but it still wasn't quite finished just yet. In order to separate the two parts of the upper and lower walls, I wanted to add some sort of inexpensive trim around the room. I ended up buying a very inexpensive 8' board (total cost was $1.40) to do the job and nailed it up to the wall.


My oldest wanted to help add the trim so she got to hammer a few nails on. :)


Such a good little helper!!


And here are a few photos after all the trim was installed and painted:


The pattern is subtle, but still noticeable and the space feels much more lighter! :)
And one of the best parts about this project (aside from working with my girl which was at the top!!) was that the total cost for the paint and trim was about $30. 

Have you ever worked with a stencil? How did it turn out?