
Today I would like to post some pictures of the mirrors I have been updating for our dining room.
In yesterday's post, I talked about the materials I used to update our Target mirrors and today, I have some pictures of what they are started to look like after I applied the wood veneer to them.
Here is a semi-final result of our Target mirrors.
You can see I changed up the pattern from what was there before and went for something a little different. I love the pattern on the mirrors now more than what was there before.

As a reminder, here is what the mirrors use to look like before I decided to change them up a bit.
They definitely needed a little bit of updating, don't you think?

Here is another shot of what the mirror is looking like as of now...but I still need to paint the wood veneer.

To start, I measured out how much wood veneer I needed. It helped that I already had paint on the mirror to use as a guide.
I also used a level to help keep the wood veneer straight.

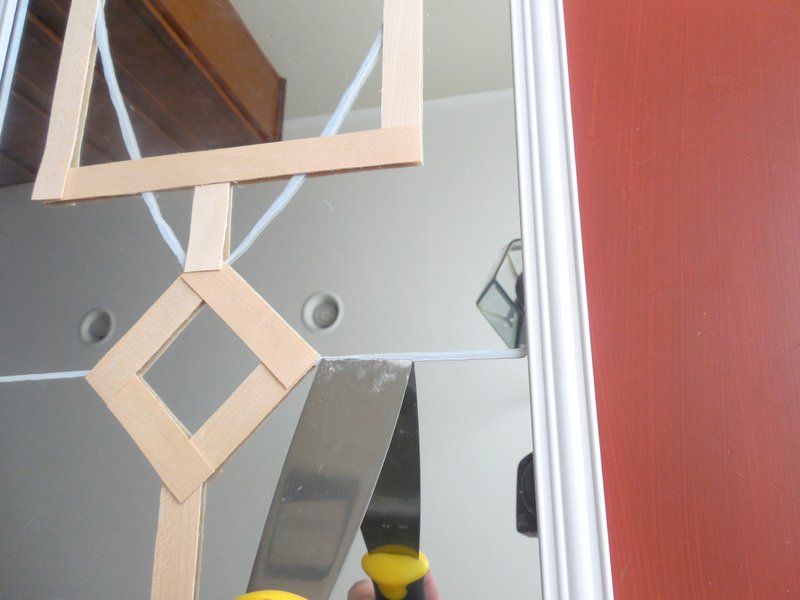
Here is a close-up of the wood veneer going on to the mirror.
You can see that I still have a little paint left on the mirror that hasn't been covered yet.
Don't worry though, that was removed later on. :)
You can see that I still have a little paint left on the mirror that hasn't been covered yet.
Don't worry though, that was removed later on. :)

Just a shot of the materials I used. :)

Here is the mirror almost complete...

I used a putty knife to scrape off the excess paint that was originally painted onto the mirror.
It came off easily...
Now all I have to do is paint the wood veneers and we are done!!
Stay tuned for more! :)
Thanks for stopping by!
Cute, thanks for sharing. I love DIY decorations from Home Depot are you staining or painting them after.
ReplyDeleteDesiree @ yourcraftyfriend.com