Monday, January 30, 2012

Umbrella Holder: The Finished Product

On Friday, I showed you some before pictures of our entryway. We really didn't have anything by the front door, so when it rained outside, for example, we had no place to put our umbrellas. We were originally placing our umbrellas in our garage after use, but then I had an idea!

Why not create a unique umbrella holder for less money than what you would buy at a department store?!


To refresh your memory of what our entryway looked like before, here is another picture for you:


Isn't it functional? Hehe...not really, but now we have a solution.

So last week, my family and I went to Home Depot to buy some twine to wrap around the tin holder we found at the local Thrift Store.  (and remember, it was under $5.00!!) 

After purchasing the twine, I went to work over the weekend and began wrapping the twine around the tin holder. I made sure to use my glue gun because there had to be some way to keep the twine attached, and using a glue gun was the best option.


Here is the glue gun and the twine we bought. I love the thickness of the twine. It will give our umbrella holder some character.


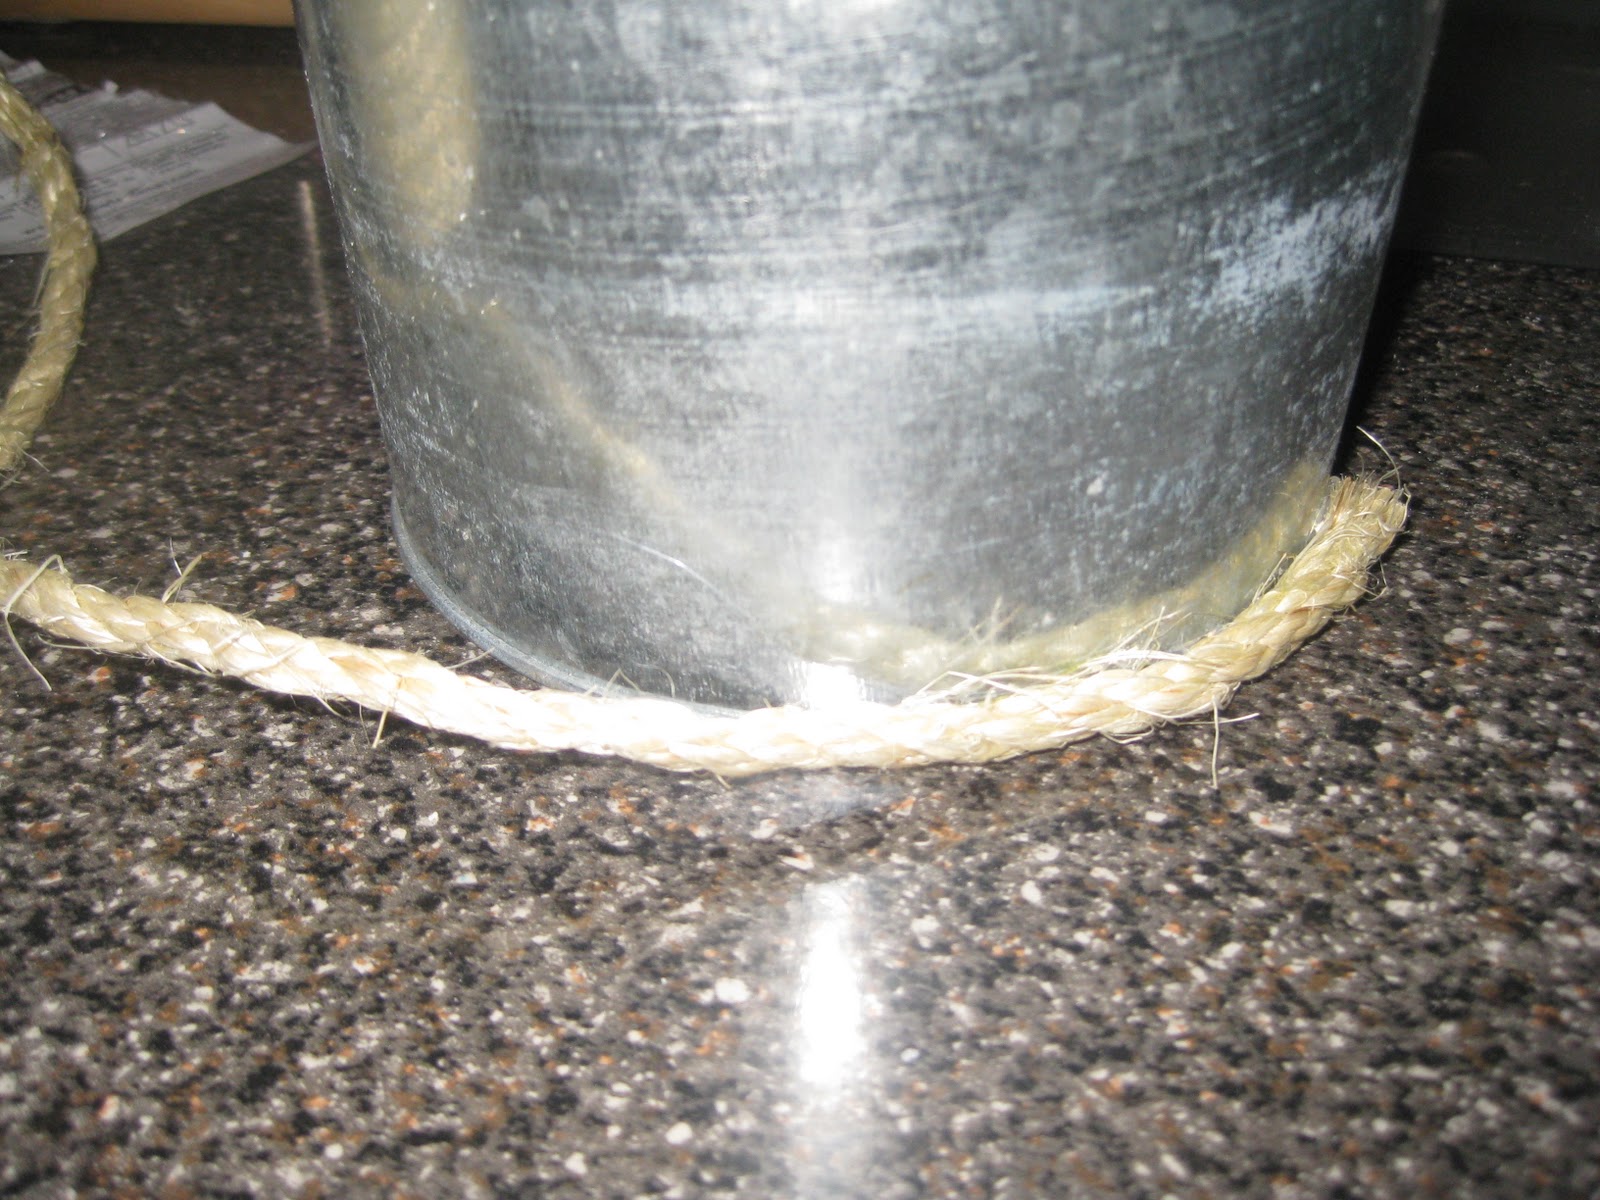
Getting ready to wrap the twine around the umbrella holder.


                  I used the glue to hold the twine onto the umbrella holder to make sure it stayed on.


Here is what it started looking like once it was wrapped halfway. Almost done!


I did needed to purchase a few more rolls of twine at Home Depot at this point because we ran out of it...but the twine only cost about $5.00 for 50 yards, which was great! It saved us a lot of money in the long run. And of course, we COULD have left the tin holder in its original state, but it didn't go with the decor of our home and I wanted to personalize this project.

By the way, sorry about the baby bottles in the background...didn't think about removing those for the picture.   :)


More than halfway finished!!


I am loving the twine look!


Once I finished wrapping the twine around the tin, I made sure to glue any remaining parts that needed it. We think it turned out fabulous!! And it was a super EASY and super CHEAP project to do!


In this picture, we only have one big umbrella in our holder, but don't be fooled...it can hold more than that!  :)


I hope you are able to do some fun and easy projects around your house...and find a way to make it inexpensive!


Thanks for stopping by!

Friday, January 27, 2012

Umbrella Holder- Entryway

I am really excited to post about another thrift store find!  :)  Man, do I love our local thrift store. Can you tell? It seems to me that my family and I are always stopping by there and they have so many great deals. I really encourage you to check out one near you if possible!

Okay, so I would like to start off by saying that our entryway, or lack there of, is a little blah right now. A few days ago, it rained in our area and so my husband came home with his umbrella. He had set his umbrella down by our front door and mentioned he was going to move it to the garage later in the evening, and then a thought hit me!! Why not make an umbrella holder?!?! Yes, that was it! That way, it gives some character to our entryway and also serves as some great storage. I had a few ideas going through my head of what I wanted, so the next day I headed out to Target and the Thrift store for some ideas.

Target had some neat things on display, but again, the price was something I wasn't too keen on spending.


Vine Umbrella Holder This puppy cost $50.99 at Target! Yikies! It is cute, but not something I was sold on.


Atlantis Umbrella Stand - Pewter Again, kind of cute, but this was $38...eek!!


Bird and Branch Hall Tree/Umbrella Stand - Antique White This was $100, but wasn't what I had in mind.


I headed to the local thrift store and found a vase for $9.98, but I wanted to wait a few more days before I made a final purchase. I am sooo glad I was patient and didn't buy that vase right away...my hubby always talks about how important it is to be patient, and he is so right

(Be patient, therefore, brothers, until the coming of the Lord. See how the farmer waits for the precious fruit of the earth, being patient about it, until it receives the early and the late rains. ~James 5:7)

Maybe this verse doesn't exactly apply to shopping, but it is still a wonderful verse about being patient and I am glad my significant other teaches me about that!

Okay.....so.....

Here is what we found today!!!!


I know it doesn't look thaattt great, BUT with a little TCL, it will be gorgeous. And even better...guess the price? 

$4.98!!!!!!!!!!!!!!!!! As soon as we walked into the thrift store today, this little beauty was standing right there by the doorway of the store, and they had a few more of them, too.

So here is the plan....I am going to clean out the vase and make sure it looks spiffy. Then I am going to take some twine, which we purchased at Home Depot for under 5 bucks, and wrap it around the vase! It should be fabulous when it is finished.  :)

Here is the twine we bought today:


Can you picture it?


I will post the final product and how I did it on Monday, so stay tuned!  :)


The next time you see this, our entryway should look better than this:


Thanks for stopping by!

Thursday, January 26, 2012

Creating a "Crown Molding" Effect and Paint Color

I have always loved crown moldings in homes because it gives a house character...and it looks really good, too! Of course, when we bought our house last year, none of the rooms in our home had crown molding and they still don't. It isn't that expensive to put up, but I have heard it can be a little bit of a pain if you've never put up crown molding before so I think we will wait a few years or so before we decide to do a big project like that. Until then, I did some research on the web about how one could create the crown molding effect in their home without actually putting up real "crown molding." Does that make sense?  :)  I hope so...and here is the answer to that question.

What to do? Well, create crown molding with white paint, of course!! I saw this on a few blogs last year and wanted to do the same thing to our kitchen and dining room since both rooms are connected to each other with one wall. I also decided this would be a good idea to do because it was so hard for me to not accidentally paint the ceiling since the walls that connect to the ceiling have a little curve to them.

A few months after we moved into our home, I decided to paint the walls of our kitchen and dining room a color called Latte from Sherwin Williams. It was kind of a pain to choose the right wall color and I wanted to make sure to get it right. After a few sample colors, I decided on Latte. It looks quite nice in both rooms because of the color of our carpet, which is beige, and the color of our cabinets, which are cherry. You have to be careful when picking the right color for your walls because what looks good in someone else's home (or online) might not look the same in your home depending on how much natural light you get in each room. There are many other factors that can contribute to picking the wrong paint color, like making sure it will look good with the kitchen cabinets, countertops, carpet or wood, etc. Therefore, bringing home paint samples and testing them on your walls is a good place to start.


After choosing our paint color, this is how the rooms turned out.


Here are two pictures of our dining room below with Latte on the walls:


Sorry about the mess on the table, but this is what it looks like at any given time during the day. :)


Here is a picture of Latte on our walls in the kitchen:


As you can see, the dining room is not as dark as the kitchen because of the amount of natural light we get in our dining room. However, we do like this color on our walls because it makes the rooms feel cozy and warm which is what we wanted.


Now, if you look at all 3 pictures, it might look like there is crown molding on our walls near the ceiling (at least I hope it looks like that!).   :0


So, to do this, what I did was paint all of the walls with Sherwin Williams, Latte, and let the paint dry. Next, I used a leveler to help me tape off where I wanted my "crown molding" to go. I used  Sherwin Williams, Bone, to paint above the tape. Bone is also the same color on our ceilings and so if I got a little paint on the ceiling, it was no biggie! YAY!!


I really wish I took pictures of the whole process because it would paint a better picture (no pun intended) of how to create the look of crown molding in your home, but again, this was way before I thought about starting my own blog. Sorry!


Here are a few more pictures of the crown molding effect on our walls.


I think it looks pretty good and does the job we wanted it too for less than what it would cost if we bought the molding ourselves and put it up in both rooms.

I have also done the same thing in our loft and the guest room, but I will save those posts and pictures for another day.  :)


Thanks for stopping by!

Wednesday, January 25, 2012

Thrift Store Finds- Dresser

Today's post is about more thrift store finds my love and I found at our nearby store. Going to thrift stores and just looking around is so much fun and you can find so many neat items for way less than you would if you bought something brand new off a department shelf. Maybe thrifting isn't for everyone, but I find that if you buy something and add a new coat of paint to it, or whatever, you have something that looks brand new and does the job for way less money!

Here is an example of a great find we purchased last month. My husband and I needed a dresser for the guest room because all we had in the guest room a few months ago was a bed and curtains (and some paint on the wall I wasn't too keen of but I ended up repainting the room anyways). I searched online for dressers and found some really neat ones from various stores like IKEA, Target, Overstock.com....I think we even looked on Amazon.com, but even they were too expensive for what we were looking for.

BIRKELAND 6-drawer dresser, white Width: 63 " Depth: 20 1/2 " Depth of drawer: 17 3/8 " Height: 35 7/8 " Maximum load/drawer: 44 lb  Width: 160 cm Depth: 52 cm Depth of drawer: 44 cm Height: 91 cm Maximum load/drawer: 20 kg

Above is a dresser I found on IKEA's website. This beauty cost $299 and we were not about to spend that much on a dresser. So I kept looking at their website and found another dresser I loved, but for $299 as well, it was wayyy too much!

HEMNES 8-drawer dresser, white Width: 63 3/4 " Depth: 20 1/8 " Height: 38 1/4 "  Width: 162 cm Depth: 51 cm Height: 97 cm
Target also had some dressers online and in the store and here are some that we looked at.

Dresser - Blueberry
Guess the cost of this one??    $160.00...No way!!!


Simply Basics 3 Drawer Chest - Black  Okay, so this one is $55 but it only has 3 drawers and we needed something with a little more storage.


So, what did we end up doing?? Well, if you read my title, then you would know the answer to that question. We headed to the thrift store one weekend and found exactly what we were looking for and the price tag wasn't too bad, either! :)


We bought this dresser for $30 and it was originally a lighter color, but I painted it a gray color to match the room. It is only paint, so if I get tired of the gray color, I can always repaint the dresser. Fabulous!! The fabric on the sides and on the top did not come with the dresser, obviously, but I added those myself with some left over fabric I had from a pillow I made for the room.


We are so excited we only paid $30 for our dresser and it has 6 drawers that will hold all the clothes we need for guests and for Tessa when this eventually becomes her room years down the road! :)
Gotta love a great deal!


So this is what the dresser looks like today, but I might change out the handles on the front of the dresser for some nickel ones or something...but that might not be for a while.


Hopefully you can find something you love and can use in your home at a nearby thrift store...just go and check it out!

Thanks for stopping by!

Tuesday, January 24, 2012

Gallery Wall Art

I have been wanting to do something with our entryway wall for quite some time since we moved last year. The wall near our entryway was blank for a while until I painted our walls downstairs, but even that wasn't enough. I had looked through many pictures of gallery walls on Pinterest, Houzz.com, and other blog sites to get some ideas and wanted to do a gallery wall near our entryway. I figured our entryway was a great place to decorate the wall with some photos of my hubby and I and it will soon be filled with more pictures of our little one once I get those printed soon.

Here is a break down of how I created our gallery wall:

To start, I made sure to do some research on how to make a gallery wall because I didn't just wanted to put up a bunch of random pictures on the wall and leave it at that. Maybe that does work for some people, but I am not that great at doing things on the fly and keeping things straight when it comes to hanging frames so to the computer I went to look up some great photos.

I found one particular photo that caught my eye from Thenester.com and showed my hubby this picture. He loved it too so we went with it and I used it for my inspiration.


Man, I want my photos to turn out like this when I take them and upload them to my blog...well, maybe someday soon they will look just as great!  :)


After my research was complete, I took an early morning shopping trip to our nearby Thrift store (I love that place so much) and bought some picture frames for super cheap mula and then we strolled into Target and bought the rest of our frames there. I know the picture above has one consistent frame color...black...but I wanted a little more variety to my frames so I bought white and black frames and already had some brown and reddish frames in the house and used those as well.

After a few days of laying out the pictures on the floor, I took some pictures of the layouts and tried to pick which one looked the best. Next, I taped some paper together (it was actually the same paper the lady at Target used to wrap up the frames...hehe) and placed the frames over the paper and took pictures.

Here are some of the layouts I came up with (without using the paper as a background, of course)...please ignore that none of the pictures line up quite well...I will get to that later.  :)


Here is a quick photo of the pictures laid out on the paper...again, this is not what the gallery wall looks like, but I was just experimenting with different layouts first.


Here is our little cutie helping (watching) mommy work.


Loveeee her soooo much!!! She makes us smile every day and we are very, very blessed to have her in our lives!


After taking a few photos of beautiful little Miss, I had to feed her and put her down for her nap...she hadn't have a long nap since she woke up this morning so I was able to work more on the gallery wall while she snoozed away. <3


Here are some more pictures of the layouts I was deciding on. I know they all look the same, but they are actually quite different if you look closely.  :)


This was it!!! The picture above was the winner for the gallery wall. Then, it was back to placing them on the paper so I could draw lines around each frame to help me place them on the wall. So, I took a pen and traced around the picture frames, used some tape to put the paper up on the wall, and then I nailed some nails into the wall with my handy hammer. Doing this helped me know exactly where each of the picture frames were going to be placed once I had to take down the paper from the wall. This is an important step to making a gallery wall! 


Not the best picture, but this is what the papers looked like on the wall all taped up! This helped me know where the nails would be placed.


Here is what the gallery wall looks like now that it is finished! I love it!


And here is another view of the wall! YAY!!! I am so glad this wall has some character to it now and I think the mixture/variety of frames looks pretty neat!


Thanks for stopping by!

Monday, January 23, 2012

Handmade (well, kind of) Curtains and Place Mats

Good morning!

Today I wanted to post about some pretty fabric I bought at JoAnn's recently and how I made them into curtains for our dining room. I also used the same fabric to make place mats for the dining table and the color and design of the fabric works well in the room.

To start, I bought this fabric at JoAnn's with a 50% off coupon from their store, so it cost half the price of the original price tag. It's always best to use coupons or wait for a sale because you can get a great product for half, or more, of the original price. You just have to be patient if you want to wait for an item to go on sale or wait for coupons to come in. I usually check the Internet for catalog sales/coupons before I go out and shop for something. I am not that patient usually, but I am glad I was this time.  :)

Anyways, here is the fabric I bought at JoAnn's. Isn't it pretty?


I knew a green colored fabric was something I wanted for the room so when I spied this at the fabric store, it was love at first sight.

I also bought two of these at JoAnn's so there was no sewing needed here, just an iron. :)


It is called Steam-A-Seam and it works great!!

What I did was place a few strips of the Steam-A-Seam onto the fabrics edges and just ironed away. You have to iron each area with the strips for 10-15 seconds and voila! You have beautiful curtains ready to hang on the rod. Just make sure to measure the length of your curtains so you don't end up with something too short or too long depending on how your rod is being hung from the wall. I wanted our curtains to be touching the floor because if it was too short, it just wouldn't look right- at least to me that is. :)


You might be wondering why there is no dining table in the dining room above. Well, the pictures above show what the dining room looked like when we moved the dining table out of the dining room and behind the couch near the entry way. We thought the dining table looked great placed by the entry way near a big window we have in the house, but it is something we can always go back and change if we want to put the dining table back in that spot again. For now, the dining table is back in the dining room and it looks pretty good there too- so it will stay for a while. :)

Don't you like our dog, Hilo's, towel on the floor? Haha! It is a good place for Hilo to wipe his paws when he comes in from outside and it helps keep the carpets clean.

I also wanted to make matching place mats out of the same fabric that we have for the dining room curtains. It only took about 2-3 yards of fabric for the place mats and I can take them off and clean them if need be. (The fabric is really easy to clean which is always a plus!!) Here is a picture of the place mats on our table.


It looks fabulous with the table runner we already had.


I used the Steam-A-Seam again to make the place mats and just ironed away again. To do this, I took place mats that we already had, placed the fabric on the front of the mats and ironed the Steam-A-Seam strips to the back of the place mats. And there you have it - a new look to your place mats and dining room and it matches perfectly with the curtains, of course.


And here is a final picture of the dining room with the curtains and the place mats in view.


Sorry for the dark photo above - the camera isn't a professional one, but it does the job. :)


In another post sometime, I will take pictures of each room and the colors I used on the walls. I don't enjoy painting walls all that much, but I love what a new color of paint can do to a room. That, to me, is worth it in the long run.  :)

Thanks for stopping by!